 |
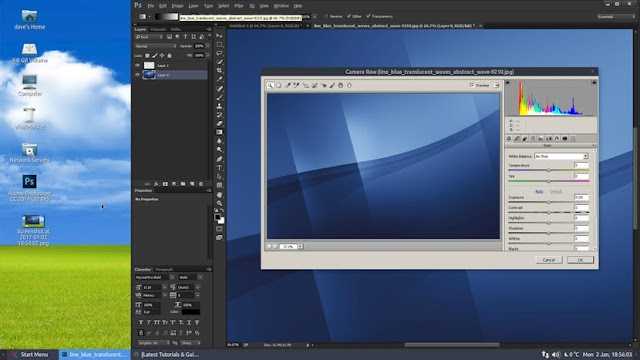
If restarting your computer to start a Windows environment or run the program under a virtualized environment are not solutions that satisfy you, this guide will show you how to install and run Photoshop CC in Ubuntu.
The execution environment under which the following steps are carried out is MATE, which should not vary from others with regard to the content thereof but only the graphic aspect. In addition, the version of Photoshop CC on which we work is the 32-bit of 2014, since the one that appeared in 2015 is not yet compatible with Linux. Since Adobe has removed the previous version from its website, you will have to search for it if you do not have any previous ones to work on.
The next step is to give a name to the Photoshop CC application, which in our case is PhotoshopCC.Installing Adobe Photoshop CC
The first step we must take is to install the PlayOnLinux tool. We can do it through the software manager of our system (Ubuntu Software Center) or through its own website where the entire installation process is described manually.
Next, we will execute the PlayOnLinux application and select the Wine version from the tools menu. We must choose the version of Wine 1.7.41-PhotoshopBrushes and then install it.
Once the process is complete, we will return to the main PlayOnLinux window and click on the Install> Install an unlisted program button (located in the left corner).
Then, in the next screen, we will click on the Next button and choose the option Install a program in a new virtual unit.
Then, make sure that you use another version of Wine than the system, configure it and install the necessary libraries.
In our guide we will select the version of Wine "1.7.41-PhotoshopBrushes" (if it does not appear in the list, go back over the previous steps and install it).
The following window will allow you to select the 32-bit version that will run under the Windows environment. Be sure to select Windows 7 and not Windows XP, which is the option that is checked by default.
Then comes the most complex (if it can be considered as such), since it involves selecting which libraries we want to include for Photoshop CC to run correctly. We will select the boxes that refer to the following libraries:
- POL_Install_atmlib
- POL_Install_corefonts
- POL_Install_FontsSmoothRGB
- POL_Install_gdiplus
- POL_Install_msxml3
- POL_Install_msxml6
- POL_Install_tahoma2
- POL_Install_vcrun2008
- POL_Install_vcrun2010
- POL_Install_vcrun2012
Once this is done, we will click on the Next button. Then we will have to navigate to the location where our Photoshop CC installation program is and start its execution.
Running Photoshop CC
Once the installation of Photoshop CC is finished, if we do not proceed to register our copy of the program we will be running a 30-day trial version. In this case it will be necessary to disconnect the computer network to continue. We will click on Enroll and wait for the system to return an error message, when we will proceed to press Enter later.Some users will notice that the installation bar disappears before it reaches the end of it, and an error message appears instead. You should not worry about this situation since the program continues to run in the background. So, stay a few minutes more attentive to the process and click on the Next button.
Finally, you can assign a link in PlayOnLinux for Photoshop CC that will create an icon automatically on your desktop.
One last note from the author, if any tool such as the Liquify utility does not work correctly, go to Preferences> Performance and uncheck the option "Use the graphics processor".


0 comentarios:
Post a Comment